
LIQUIBAND® XL
Close incisions with confidence
Designed to meet both patient and clinician needs, LiquiBand® XL is a combination product using both a mesh patch and a liquid adhesive to securely hold large and high-tension incisions closed for up to 14 days.

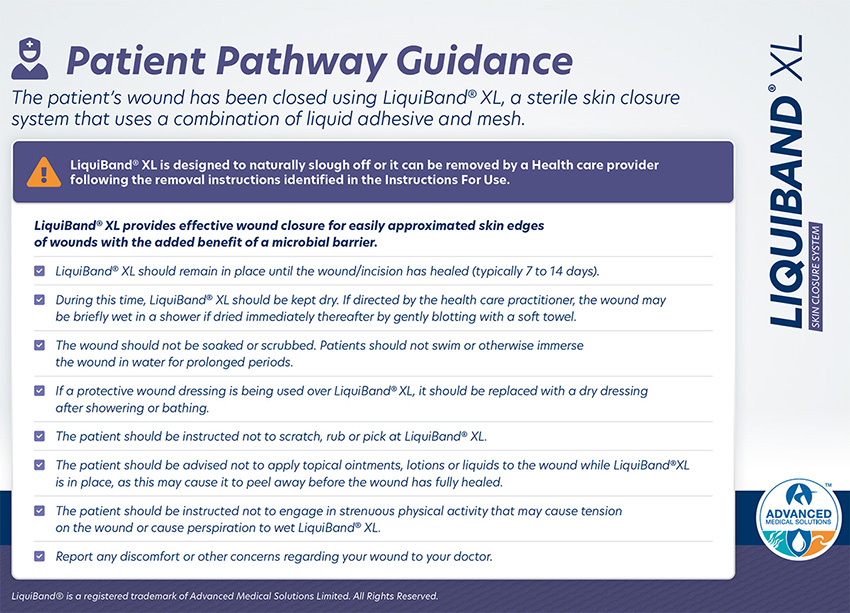
Water-resistant, allowing patients to shower immediately if directed by the physician7

Provides an effective barrier against gram-positive, gram-negative, and fungal microbes for as long as the film remains intact4, 8
Design features
LiquiBand® XL provides safe, secure, and effective closure for large and high-tension incisions
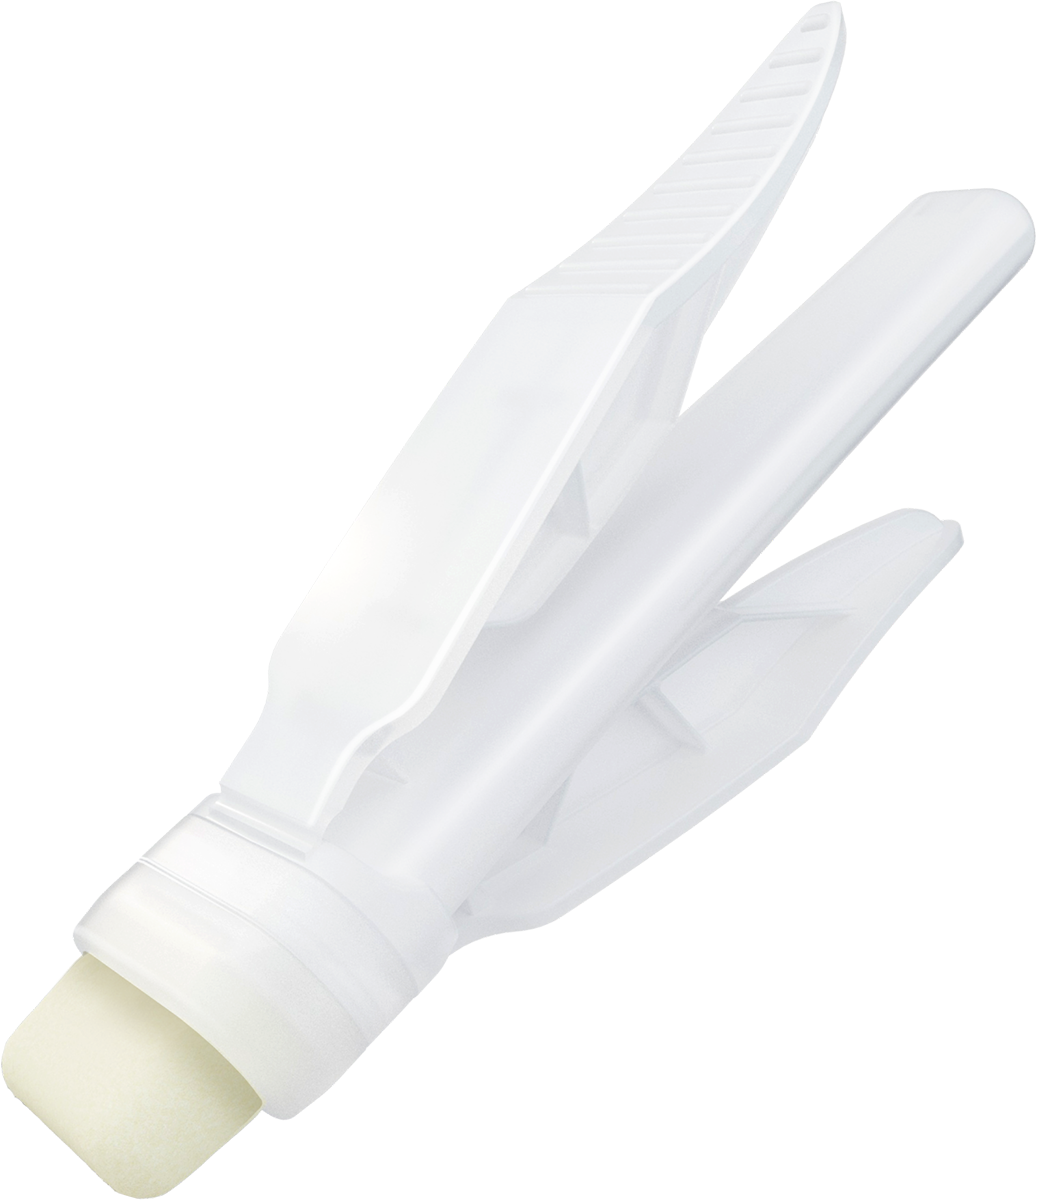
Simple, Ergonomic Applicator
- Signature LiquiBand® winged applicator for safe and efficient priming
- Wide tip for broad adhesive coverage
- Foam tip allows for controlled application
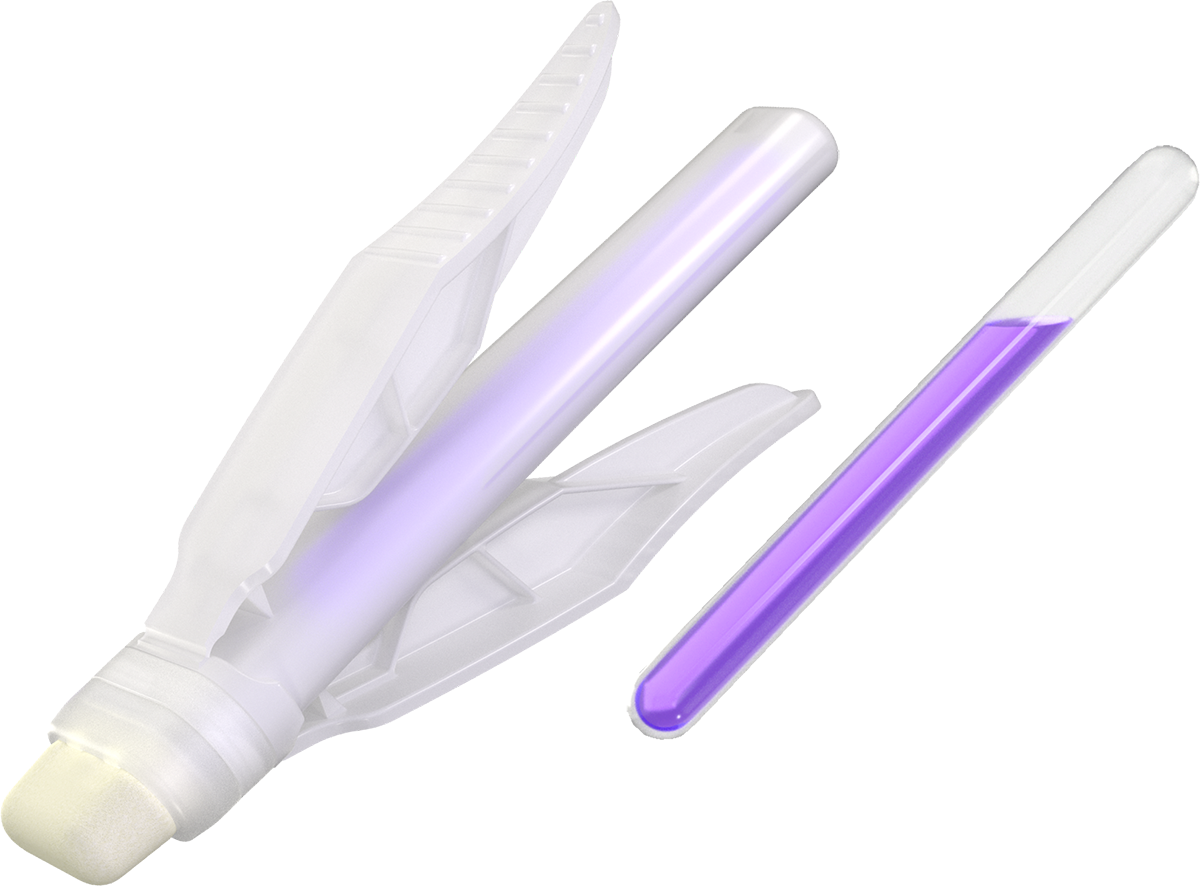
Octyl-based Cyanoacrylate Formula
- Strong and durable incision closure1-3
- Consistent dry time in as little as 60 seconds2, 3
- Proven durability for up to 14 days2, 3
- Effective microbial barrier4, 8
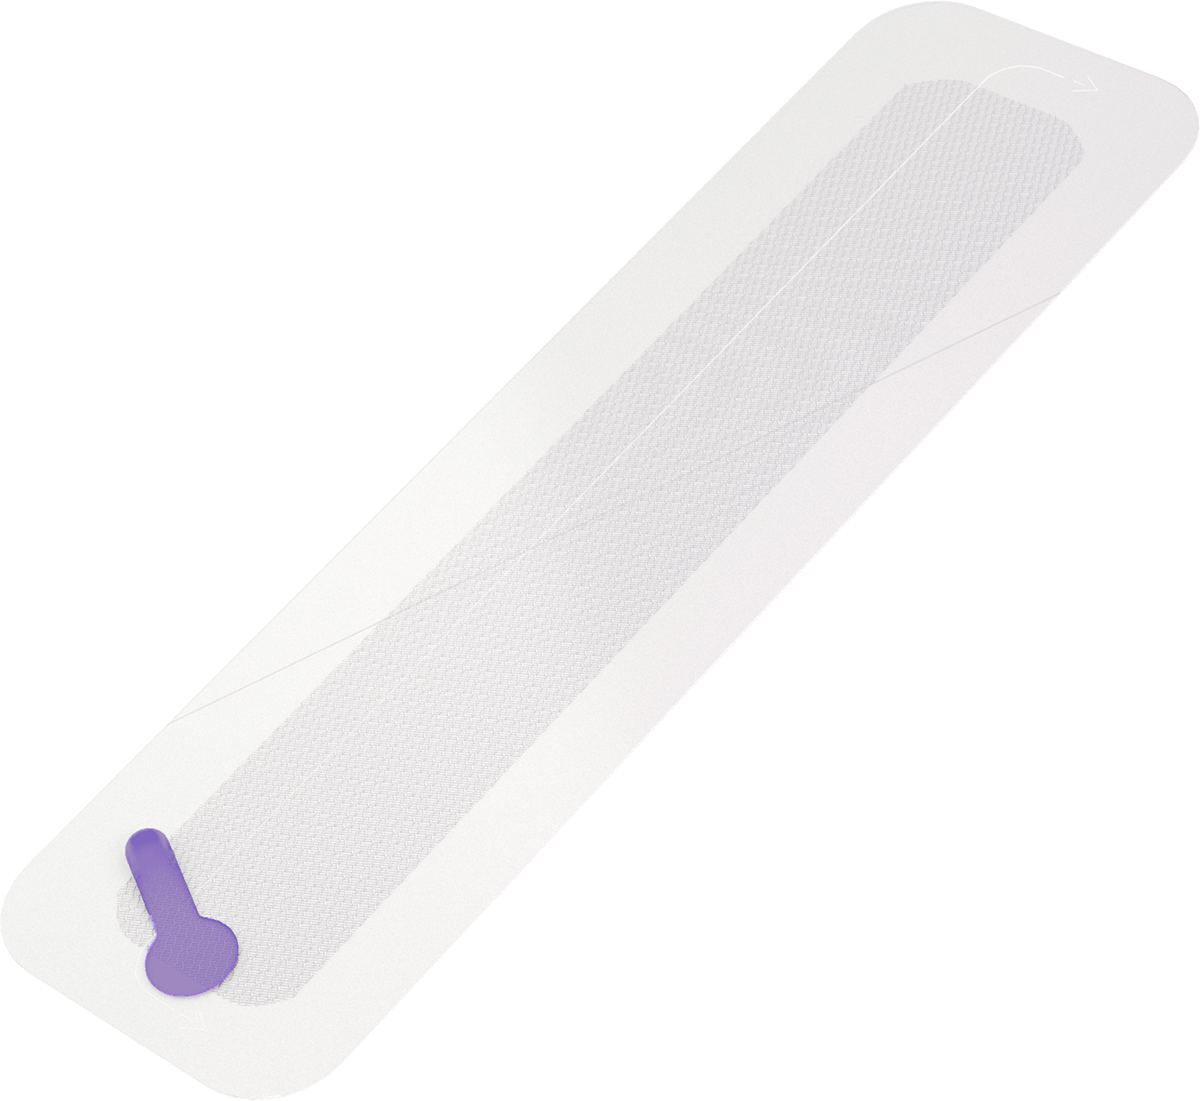
Intuitive Mesh Design
- User-friendly and easy mesh application5
- Clear mesh release liner for proper incision visualization2, 3
- Highly-visible release tab for precise release liner removal5
- Woven mesh with hexagonal pattern
Watch our video
See what LiquiBand® XL can do for you
Key benefits
Designed to meet both patient and physician needs, LiquiBand® XL offers a variety of benefits
For Patients
Provides a water-resistant microbial barrier against gram-positive, gram-negative, and fungal microbes, allowing patients to shower with physician approval.4, 7, 8

Non-invasive incision closure system that does not puncture the skin, unlike sutures or staples.2, 3

No track marks from topical sutures or staples.2, 3

Provides security for everyday activity.2, 3


For Clinicians

Provides durable closure for up to 14 days on large or high-tension incisions.2, 3

Dries consistently in as little as 60 seconds.2, 3

Secondary dressings are not required.
Procedures
LiquiBand® XL can be used on the following procedure types:
Orthopedics
Cardiothoracic
OB-GYN
Plastics
General Surgery
Spinal
Performance
25.3N
Wound Closure Strength Wound closure strength testing measures the amount of tension required to reopen a wound after device application. Higher wound closure strength results indicate a reduced risk of the wound dehiscing.
LiquiBand® XL provides equivalent wound closure strength to Dermabond® Prineo® and Exofin Fusion® 9
LiquiBand® XL: 25.36N, Dermabond® Prineo®: 22.62N, Exofin Fusion®: 21.12N
Values in (N).
46Seconds
Dry Time
LiquiBand® XL dries faster than Dermabond® Prineo® and Exofin Fusion® 9, 10
LiquiBand® XL: 46 seconds, Exofin Fusion®: 66 seconds, Dermabond® Prineo®: 175 seconds
Values in (seconds).
Application guide
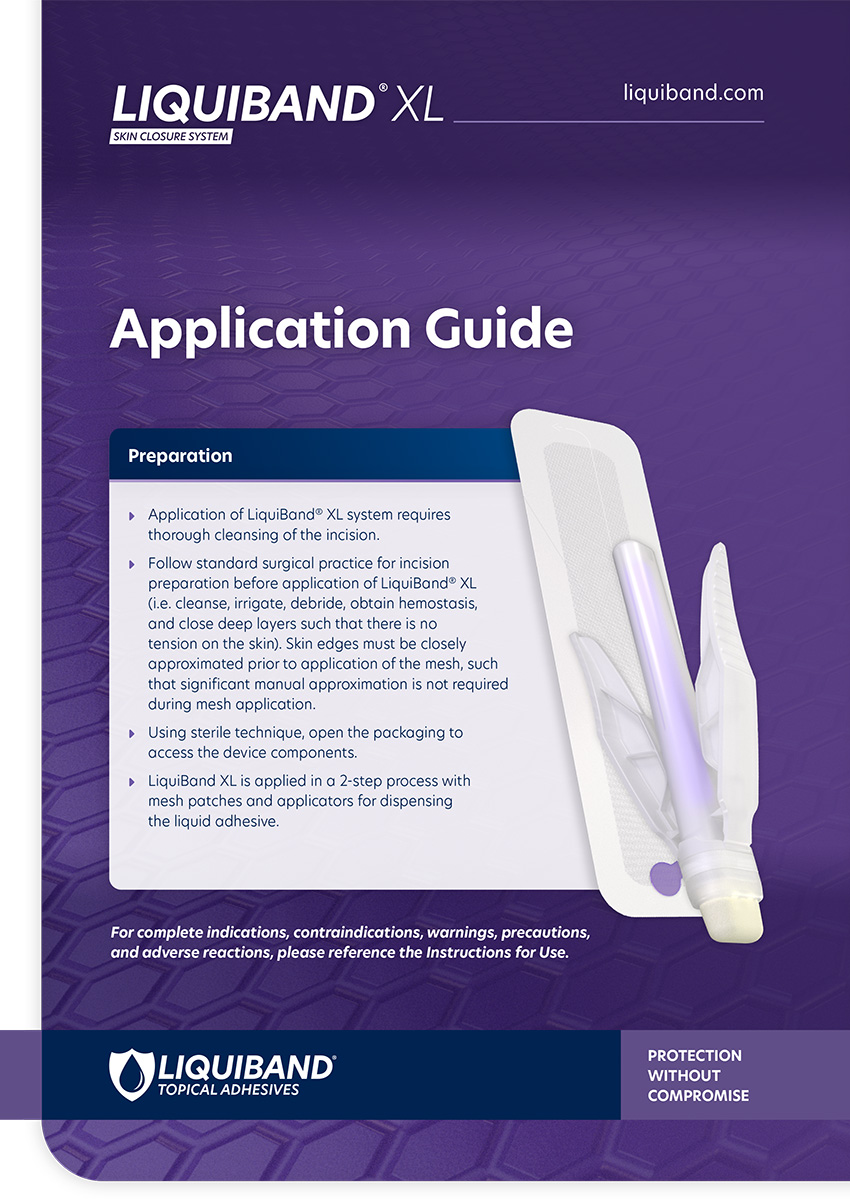
Preparation
- Please refer to the instructions for use for comprehensive instructions and warnings for LiquiBand® XL.
- Application of the LiquiBand® XL system requires thorough cleansing of the incision.
- Follow standard surgical practice for incision preparation before application of LiquiBand® XL (i.e. cleanse, irrigate, debride, obtain hemostasis, and close deep layers such that there is no tension on the skin). Skin edges must be closely approximated prior to application of the mesh, such that significant manual approximation is not required during mesh application.
- Using sterile technique, open the packaging to access the device components.
- LiquiBand® XL is applied in a 2-step process with mesh patches and applicators for dispensing the liquid adhesive.
Application
-
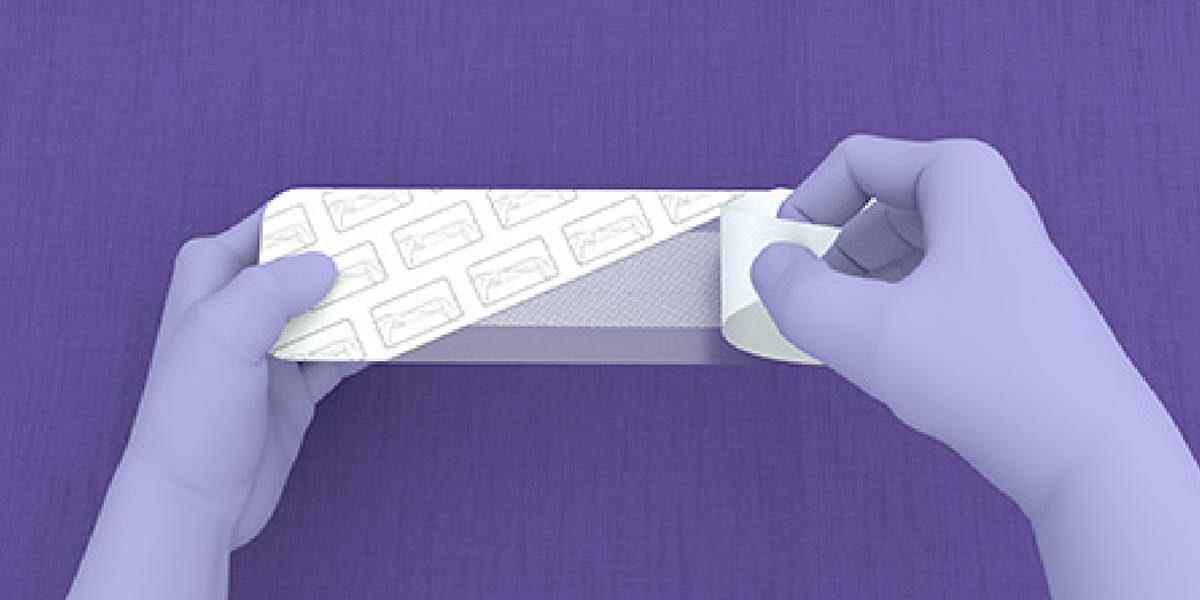
- Remove both sections of the white release liner from the mesh, peeling from the center towards the outer edge.
-
- Hold the mesh by the edges of the clear release liner while not touching the mesh.
-
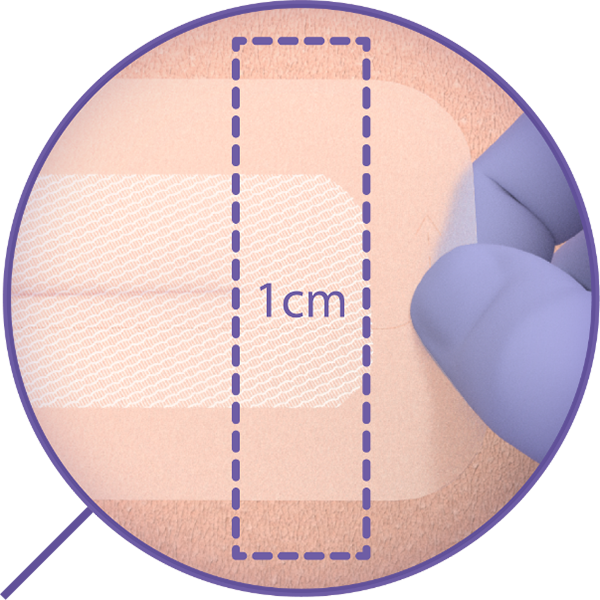
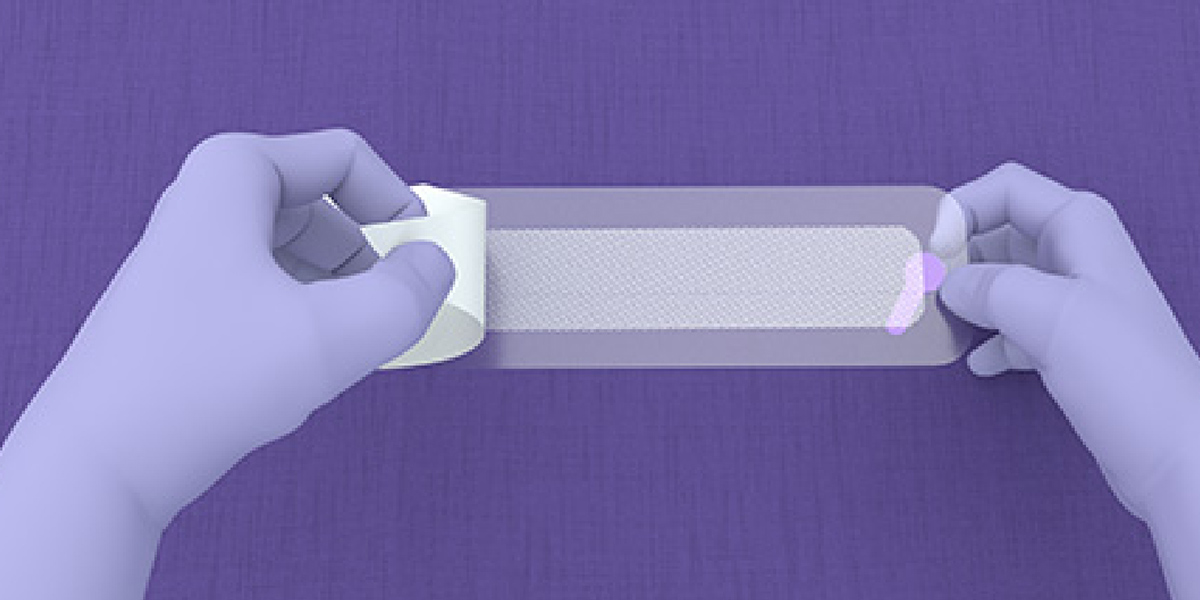
- With the adhesive side of the mesh facing the wound, position so the incision is central to the mesh (without making contact), ensure at least 1 cm of mesh extends from each end of the incision.
- Gently press the clear release liner to ensure intimate contact of the mesh to one side of the incision.
-
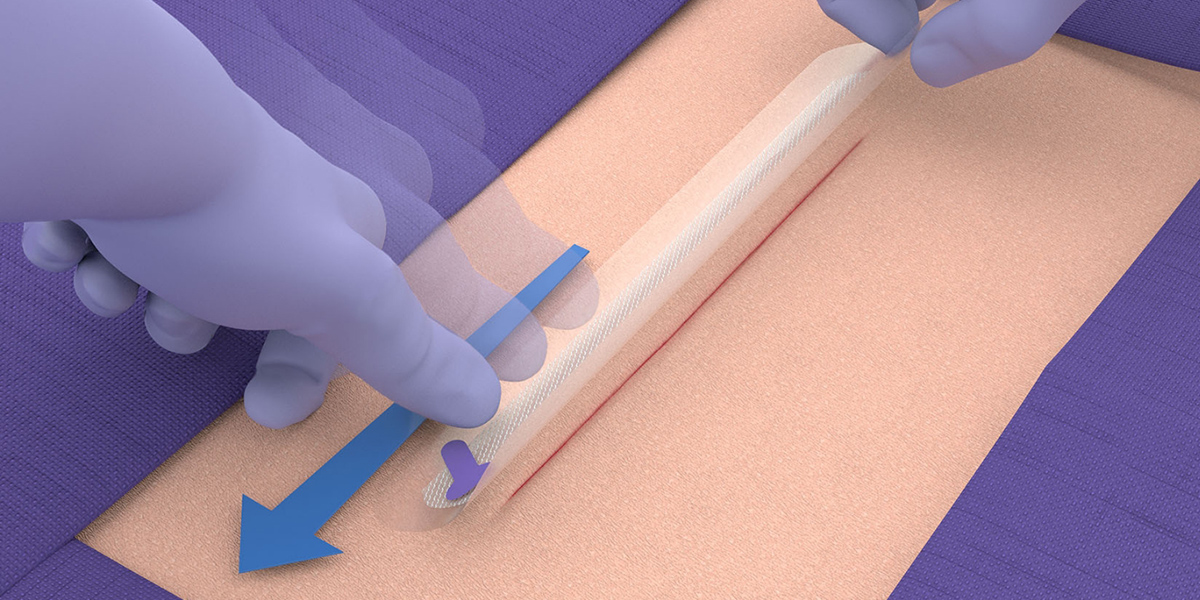
- Gently pull the mesh liner perpendicularly over the incision while adjusting with fingers or forceps to achieve skin approximation and affix the remaining mesh to the other side of the incision.
- Ensure the mesh is placed at least 1 cm from each of the ends of the incision.
-
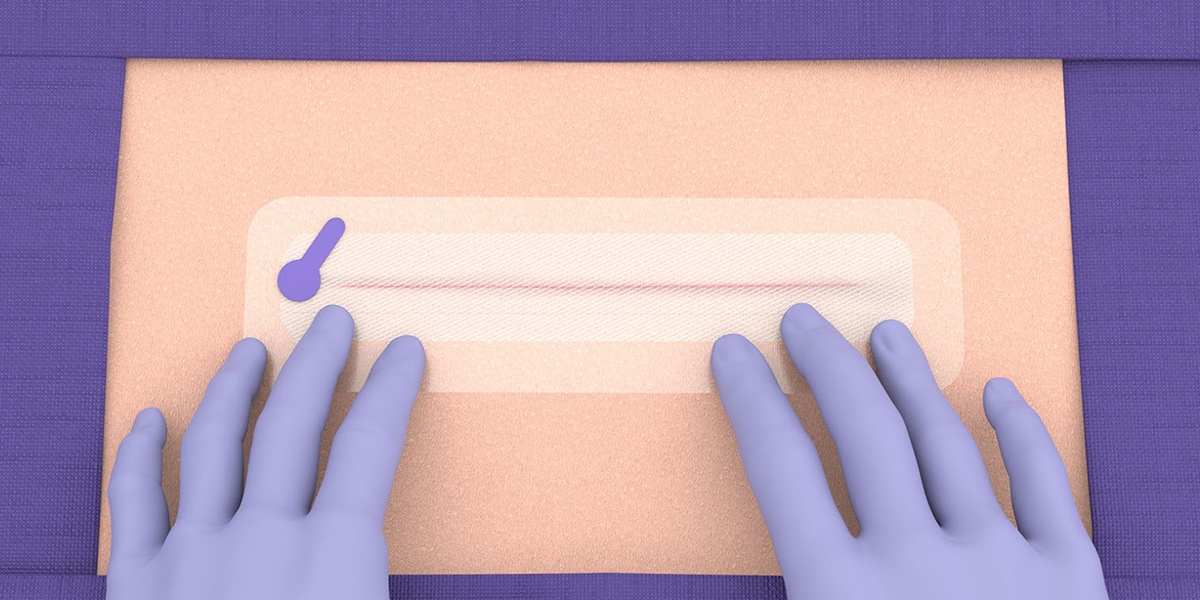
- Pat the clear release liner to make sure the mesh has fully adhered to the skin.
-
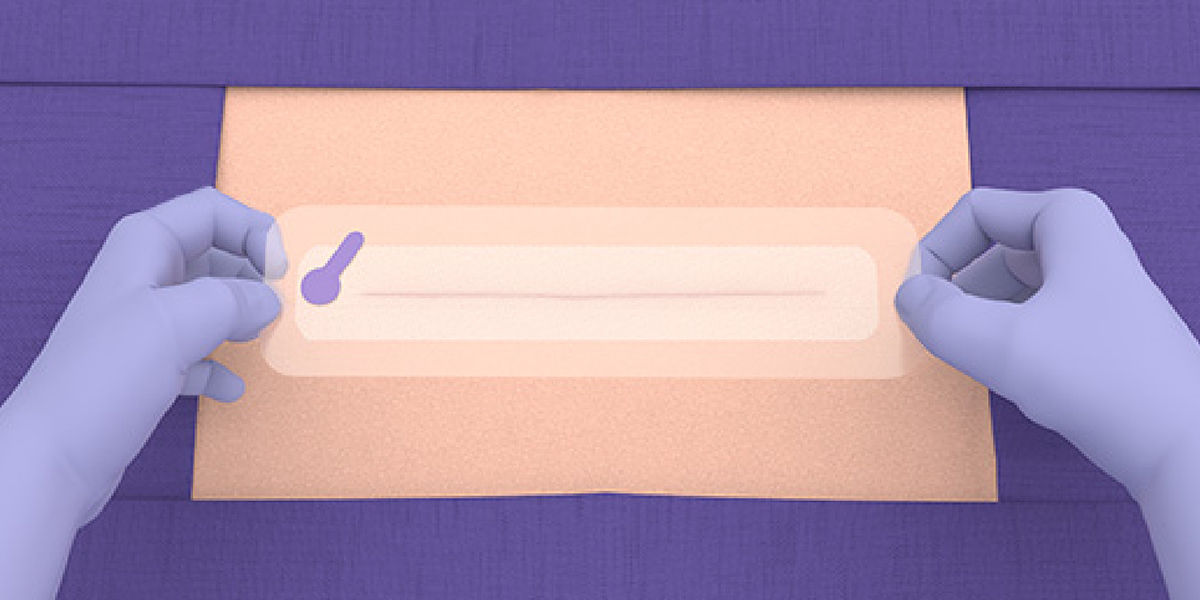
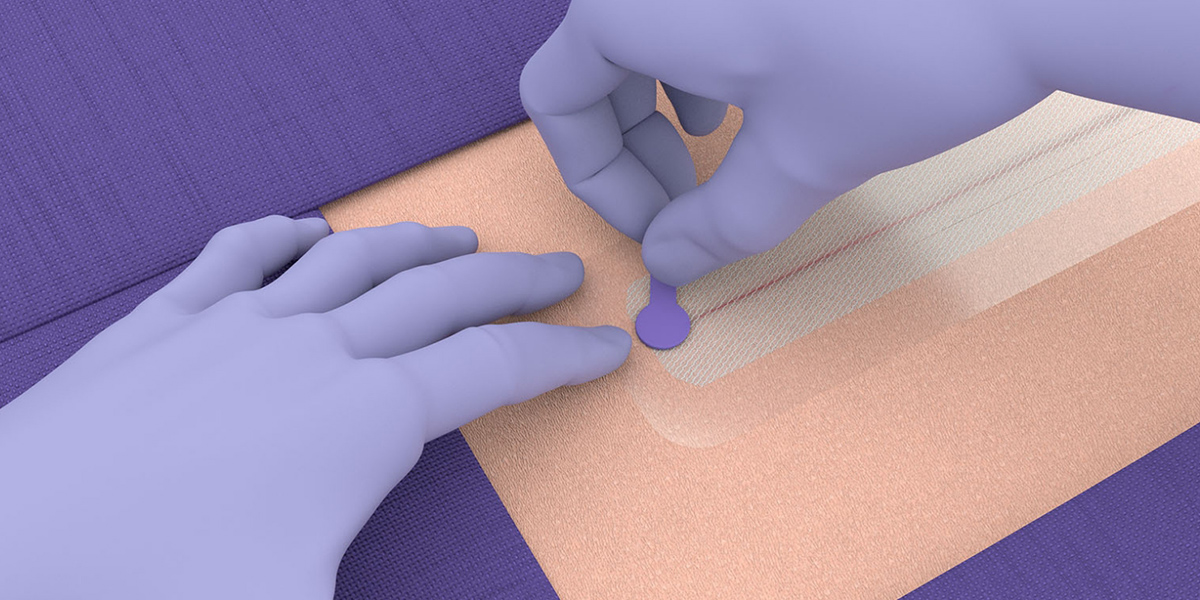
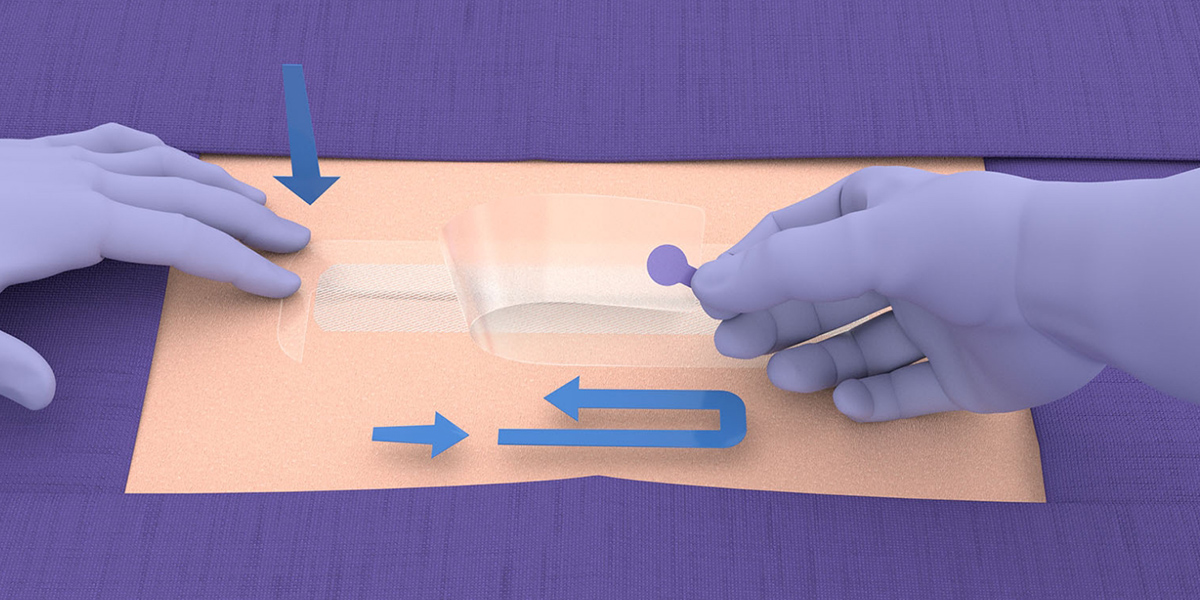
- Remove the clear release liner. Maintaining pressure on the clear release liner while pulling the release tab in the opposing direction.
- Tear the clear release liner and remove in a circular direction.
-
- Ensure the mesh is in intimate contact with the skin prior to application of the liquid adhesive.
- If mesh is loose, gently pass a gloved finger or instrument over the affected area to complete adherence to the skin.
-
- Activate the liquid adhesive applicator by holding the wings with your finger and thumb, tip pointed upward and away from the patient to avoid unintentional placement of the liquid adhesive into the wound or the patient.
-
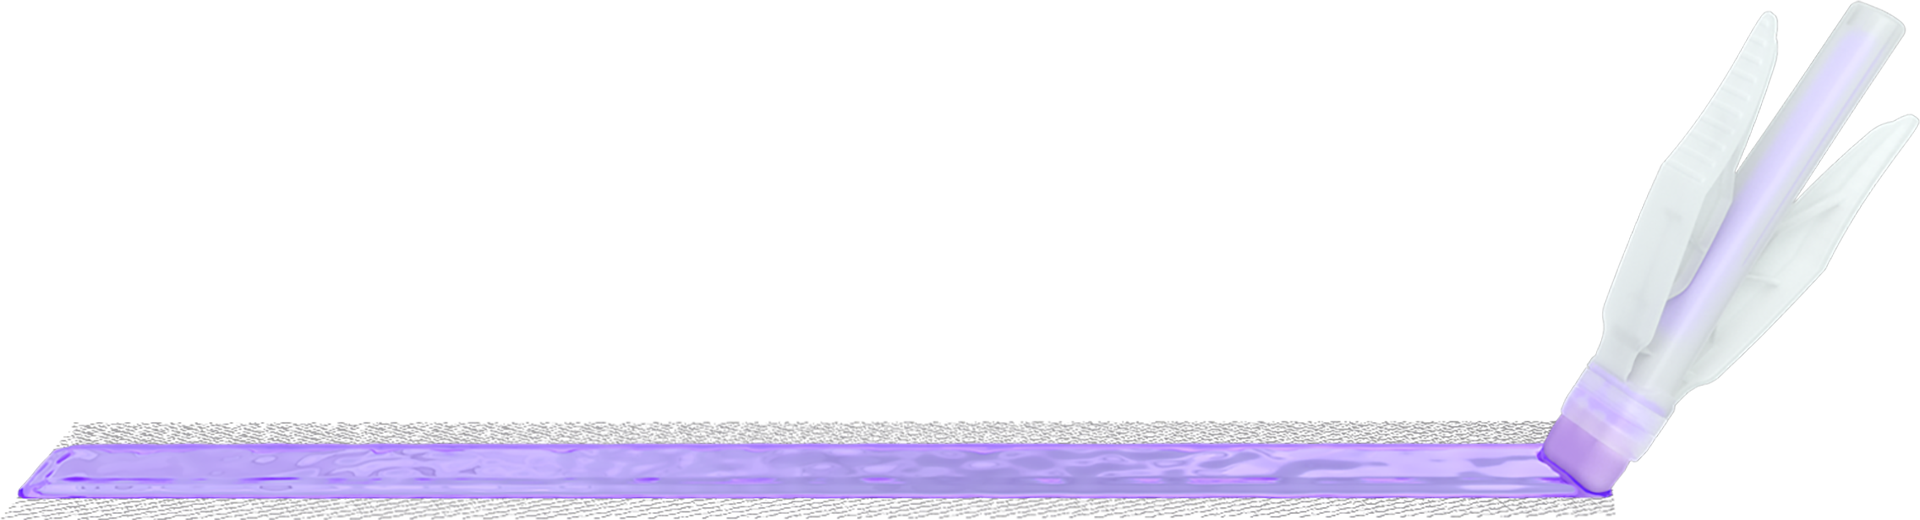
- Invert applicator and firmly squeeze to express the liquid adhesive and IMMEDIATELY apply onto mesh.
-
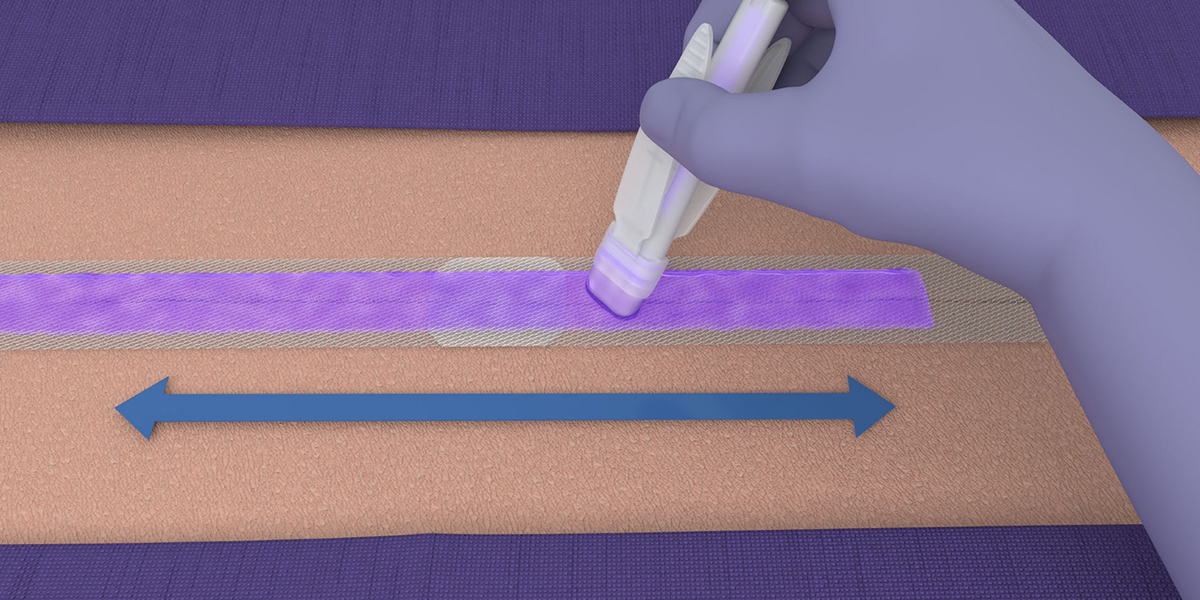
- Spread liquid adhesive smoothly and evenly over the entire length of the mesh using the foam tip, making sure that the entire mesh is covered.
- Liquid adhesive should be applied slightly over the edges of the mesh, covering a small margin of surrounding skin.
-
- Remove both sections of the white release liner from the mesh, peeling from the center towards the outer edge.
-
- Hold the mesh by the edges of the clear release liner while not touching the mesh.
-
- With the adhesive side of the mesh facing the wound, position so the incision is central to the mesh (without making contact), ensure at least 1 cm of mesh extends from each end of the incision.
- Gently press the clear release liner to ensure intimate contact of the mesh to one side of the incision.
- For incisions longer than 20 cm, mesh should be positioned so that at least 1cm of mesh extends from the beginning of the incision.
-
- Gently pull the mesh liner perpendicularly over the incision while adjusting with fingers or forceps to achieve skin approximation and affix the remaining mesh to the other side of the incision.
- Ensure the mesh is placed at least 1 cm from each of the ends of the incision.
- For incisions longer than 20 cm, additional mesh patches should be applied so that at least 1 cm of mesh extends beyond the edges of the incision.
-
- Pat the clear release liner to make sure the mesh has fully adhered to the skin.
-
- Remove the clear release liner. Maintaining pressure on the clear release liner while pulling the release tab in the opposing direction.
- Tear the clear release liner and remove in a circular direction.
-
- Ensure the mesh is in intimate contact with the skin prior to application of the liquid adhesive.
- If mesh is loose, gently pass a gloved finger or instrument over the affected area to complete adherence to the skin.
-

- For incisions longer than 20 cm, repeat steps 1-5a. For the continuation of skin edge approximation, overlap the end of the existing mesh by at least 1 cm.
-
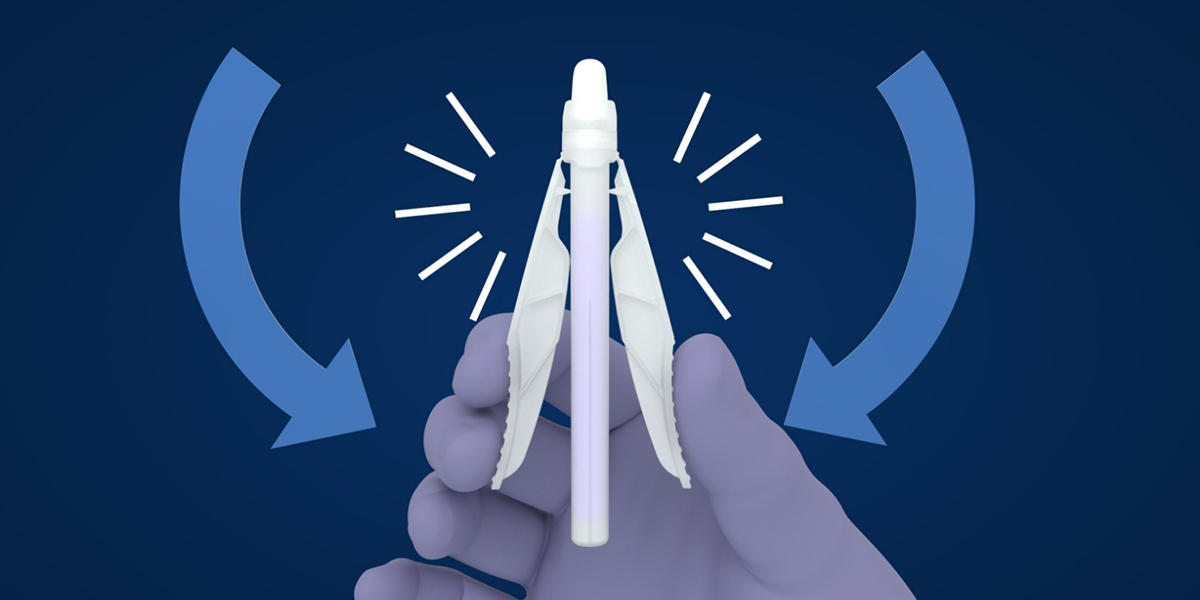
- Activate the liquid adhesive applicator by holding the wings with your finger and thumb, tip pointed upward and away from the patient to avoid unintentional placement of the liquid adhesive into the wound or the patient.
-
- Invert applicator and firmly squeeze to express the liquid adhesive and IMMEDIATELY apply onto mesh.
-
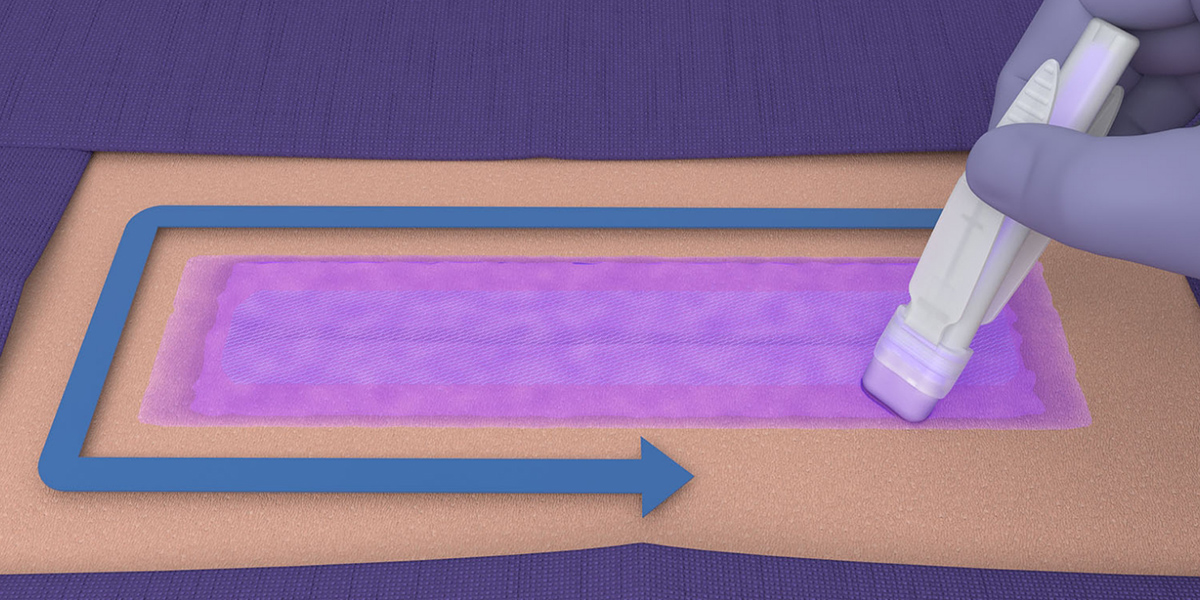
- Spread liquid adhesive smoothly and evenly over the entire length of the mesh using the foam tip, making sure that the entire mesh is covered.
- Liquid adhesive should be applied slightly over the edges of the mesh, covering a small margin of surrounding skin.
-
- Remove both sections of the white release liner from the mesh, peeling from the center towards the outer edge.
-
- Hold the mesh by the edges of the clear release liner while not touching the mesh.
-
- With the adhesive side of the mesh facing the wound, position so the incision is central to the mesh (without making contact), ensure at least 1 cm of mesh extends from each end of the incision.
- Gently press the clear release liner to ensure intimate contact of the mesh to one side of the incision.
- For incisions longer than 20 cm, mesh should be positioned so that at least 1 cm of mesh extends from the beginning of the incision.
-
- Gently pull the mesh liner perpendicularly over the incision while adjusting with fingers or forceps to achieve skin approximation and affix the remaining mesh to the other side of the incision.
- Ensure the mesh is placed at least 1 cm from each of the ends of the incision.
- For incisions longer than 20 cm, additional mesh patches should be applied so that at least 1 cm of mesh extends beyond the edges of the incision.
-
- Pat the clear release liner to make sure the mesh has fully adhered to the skin.
-
- Remove the clear release liner. Maintaining pressure on the clear release liner while pulling the release tab in the opposing direction.
- Tear the clear release liner and remove in a circular direction.
-
- Ensure the mesh is in intimate contact with the skin prior to application of the liquid adhesive.
- If mesh is loose, gently pass a gloved finger or instrument over the affected area to complete adherence to the skin.
-
- For incisions longer than 20 cm, repeat steps 1-5a. For the continuation of skin edge approximation, overlap the end of the existing mesh by at least 1 cm.
-
- Activate the liquid adhesive applicator by holding the wings with your finger and thumb, tip pointed upward and away from the patient to avoid unintentional placement of the liquid adhesive into the wound or the patient.
-
- Invert applicator and firmly squeeze to express the liquid adhesive and IMMEDIATELY apply onto mesh.
-
- Spread liquid adhesive smoothly and evenly over the entire length of the mesh using the foam tip, making sure that the entire mesh is covered.
- Liquid adhesive should be applied slightly over the edges of the mesh, covering a small margin of surrounding skin.
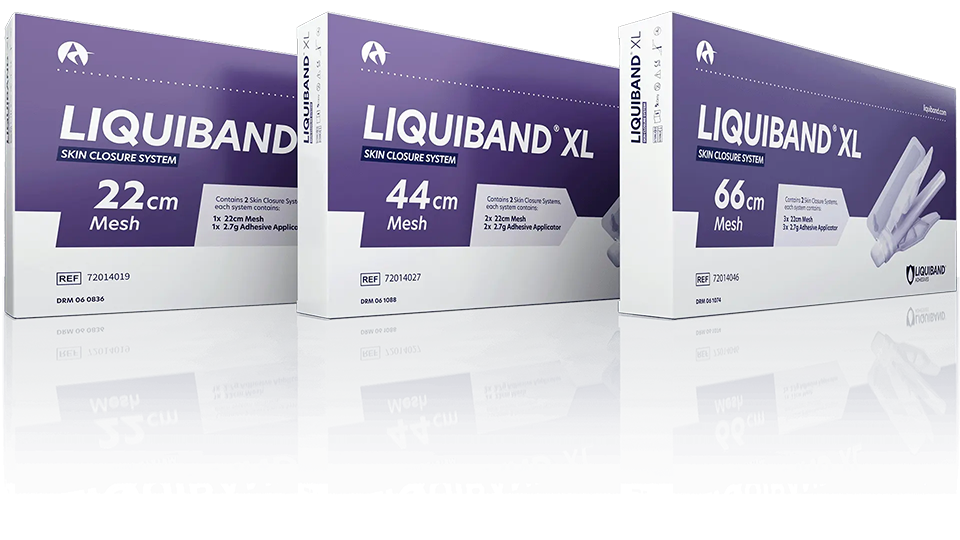
Sizes & Codes
| LiquiBand® XL | ||||
|---|---|---|---|---|
| Product Code | Qty/Box | Description | ||
| 72014019 | 2 | One 22cm x 4cm Mesh Strip, One 2.7g Adhesive Applicator | ||
| 72014027 | 2 | Two 22cm x 4cm Mesh Strips, Two 2.7g Adhesive Applicators | ||
| 72014046 | 2 | Three 22cm x 4cm Mesh Strips, Three 2.7g Adhesive Applicators | ||
Downloads

LiquiBand® XL Brochure UK
(PDF - 2MB)
LiquiBand® XL Application Guide English
(PDF - 2MB)
LiquiBand® Skin Reactions Brochure
(PDF - 3.6MB)
LiquiBand® XL Clinical Pathway Guide English
(PDF - 1MB)
Contact us for more information
References
1 - 10: All data on file at Advanced Medical Solutions Limited